The 14x24 Wyoming Cabin
An owner built 14x24 Little House on mountain property in western Wyoming, with two lofts joined by a catwalk.
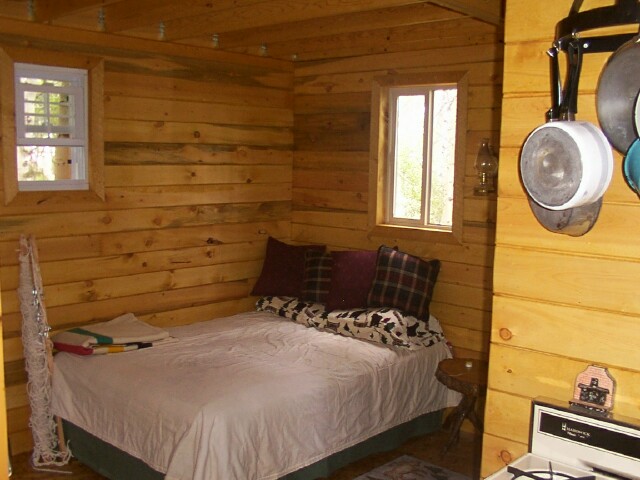
“I’ve had a number of request for shots of the interior. So here are some updated pictures.”
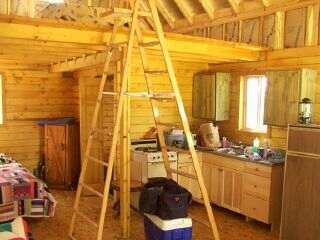
Now to the inside...
Ladder to Loft
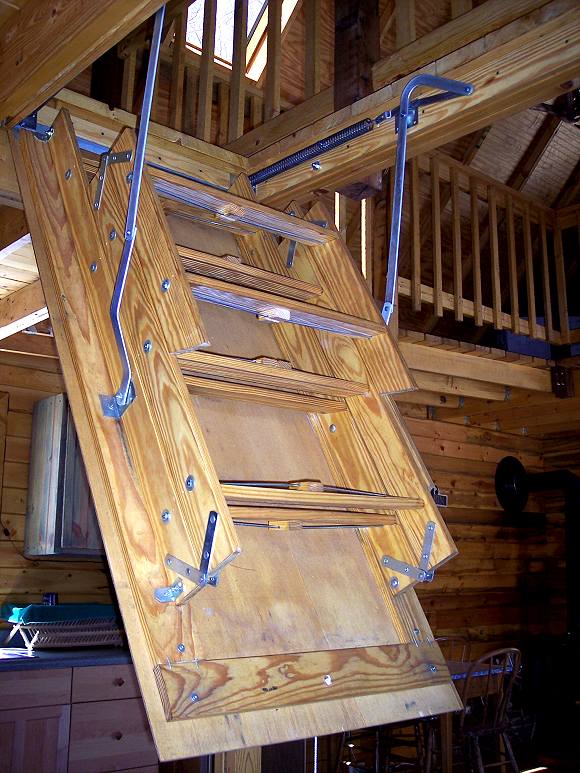
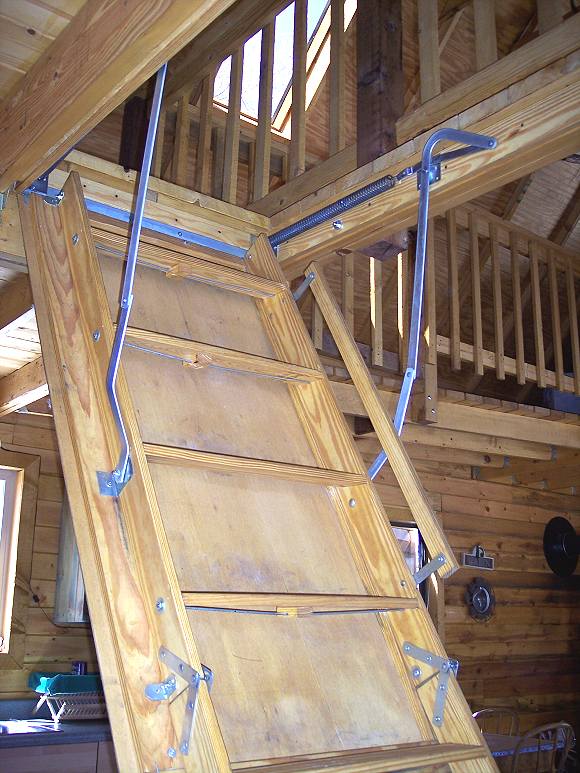
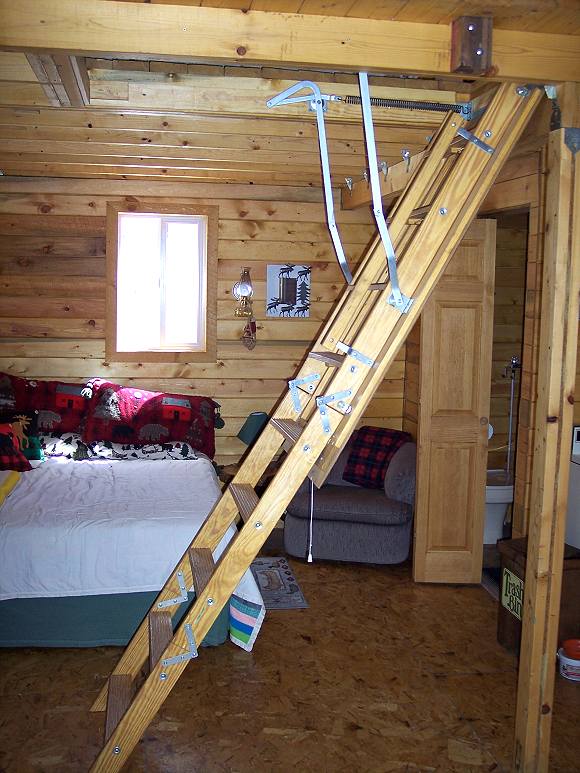
Hal sent in photos of the pull down ladder he is using for the loft.
The ladder is built by Louisville Ladder and fits in a 22 inch opening. Information on these ladders can be found at www.louisvilleladder.com
Here are two other ideas for space saving loft access:
• A simple to build ladder than rests against the wall LADDER (pdf)
• Outline drawing for an alternating tread STEEP STAIR
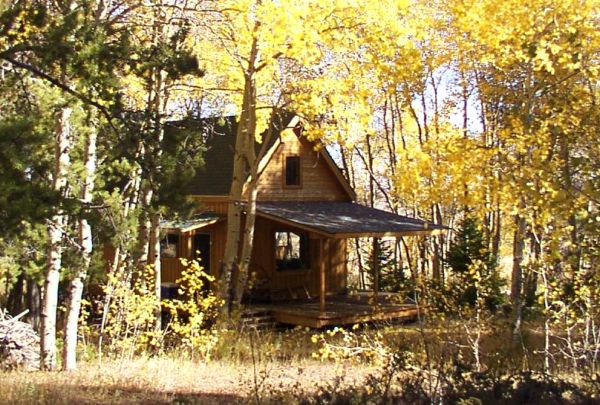
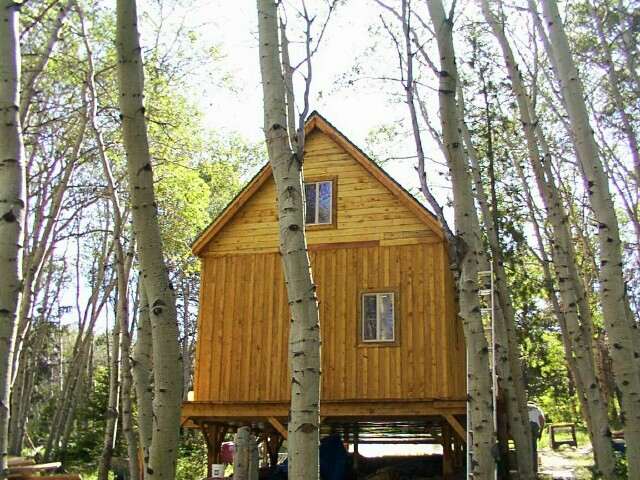
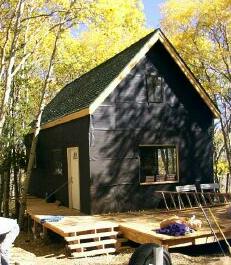
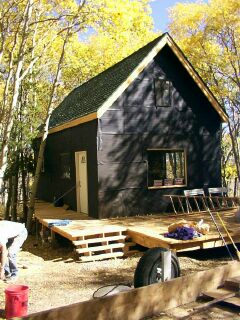
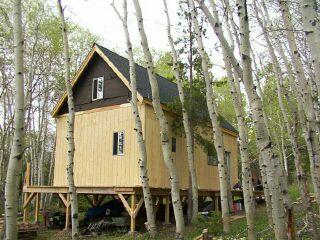
Cabin in the Fall
Earlier photos and the full construction story
Here’s the Summer 2003 report from owner-builder Hal Nash...
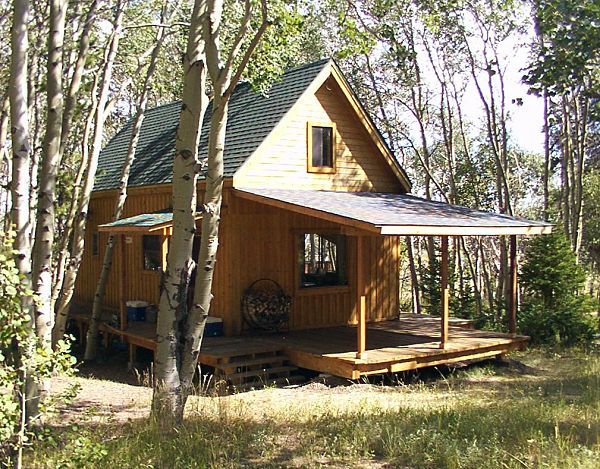
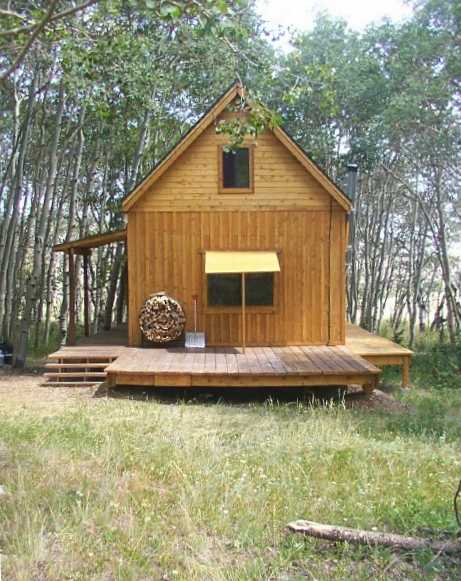
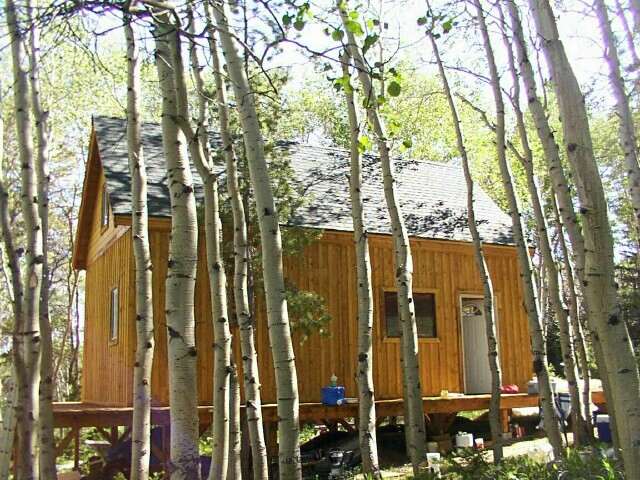
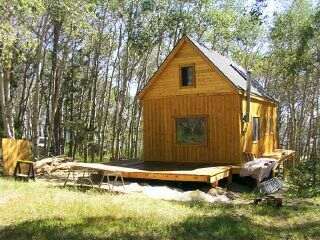
We built a shed roof over the front door, because when we came up to the cabin during the winter, the ice buildup in front of the door was so thick we had to chip it away before we could get inside. Here’s a shot of the shed roof. Also shown is a hinged awning built over the picture window at the gable end to protect it when we are not at the cabin. It also helps to shade the window during the heat of the day. There is another photo of the front of the cabin a bit further down.
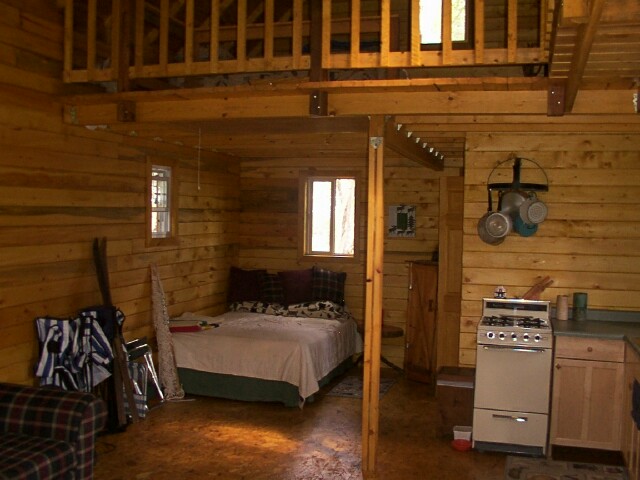
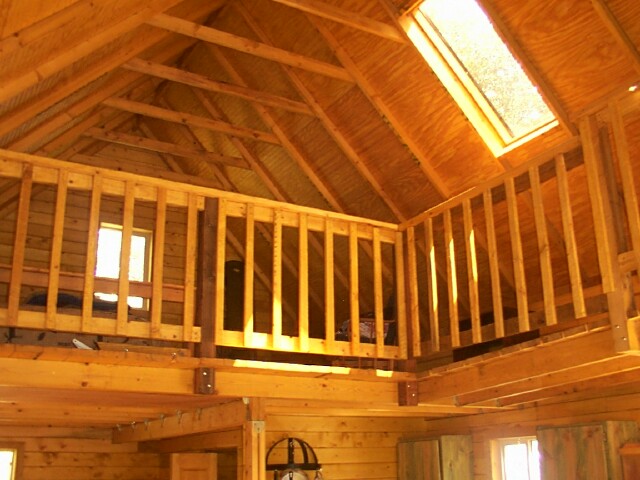
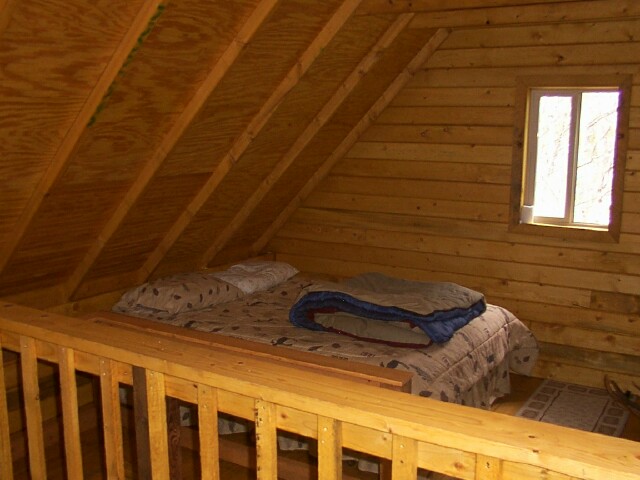
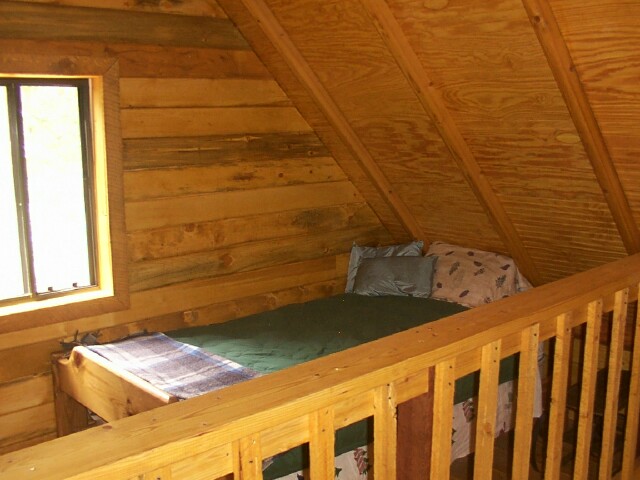
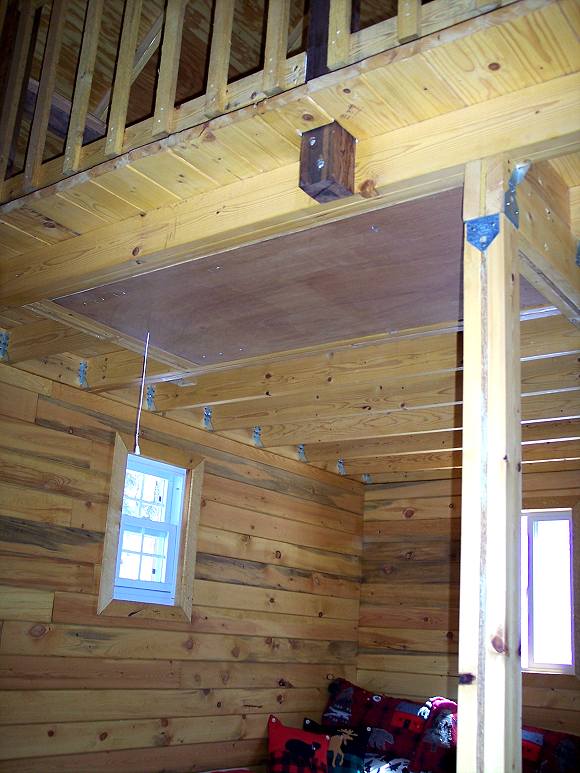
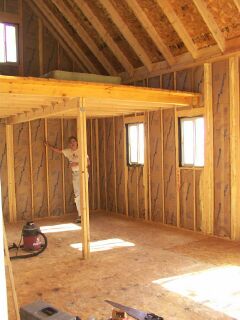
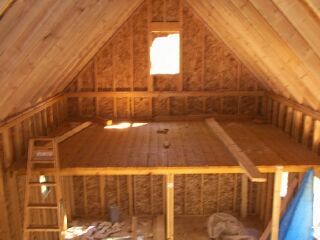
Inside, we built a catwalk between the two lofts to eliminate the need for two ladders and to create more floor space. Loft access is through a 30" wide pull-down attic ladder installed in the floor of the large loft. Below are some pics of the lofts and catwalk.


Also pictured are the loft railings we built this summer. Here’s a picture from the big loft looking over to the small loft.

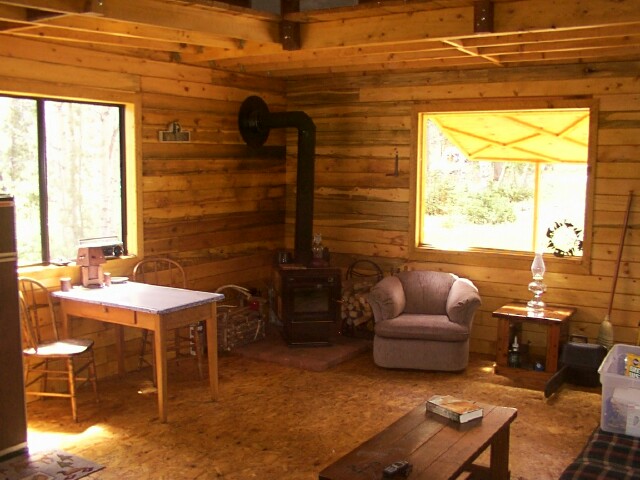
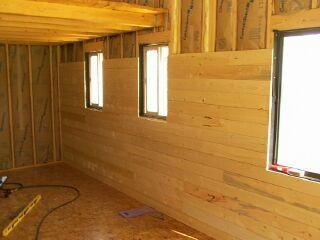
To preserve the rafter look in the ceiling, we installed 2" thick foam insulation panels between the rafters. Then we cut a beaded plywood (3/8" wainscoting) panel to fit between the rafters and nailed them to 1x2 stops. If I were to do it over, I’d forget the rafter look, and continue with my wall siding right up over the rafters. This would also give more room for insulation and a higher R-value.
I’m still in the process of installing an RV water heater for hot water in the kitchen and showers. I will do some simple surface wiring for lights, using an inverter drawing power from a couple of 12volt marine batteries charged with a small solar panel.
Thanks for all the help and advice from www.countryplans.com.
Hal Nash
Cost Update
I’ve received many questions about the cost of our cabin to get it to its present state. Excluding the cost of the land, the actual building costs to date are around $15,000. However, about $6000 of that was paid to a builder to frame the roof, and then put the asphalt shingles on (the shingles were also part of that dollar figure). Framing, sheathing, and shingling a 12 in 12 roof was beyond our ability. It was money well spent. If you are able to frame and roof such a design, you can probably cut $4000 off of the total figure. The $15,000 figure also includes kitchen cabinetry, propane cook stove and oven, propane refrigerator, solar panel and batteries, rudimentary plumbing. I still have to wire it for lights, and will install an RV hot water heater, and an RV toilet (we use a large porta potty at this time). I figure another $500 to complete these projects.
Earlier Photos and Updates
The photos below are from the Summer of 2002 and earlier. Again, Hal Nash...
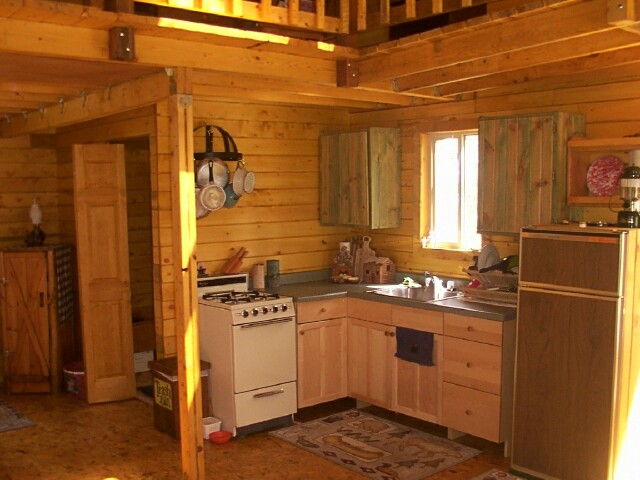
I’ve still got the ceiling finish to complete and the inside finish over the gable ends, but the entire downstairs and outside is finished. We bought a propane fridge out of a wrecked RV, converted a natural gas stove to propane, and put in an RV water pump (12V) for kitchen sink (and eventually shower) water.
A well on our property is going to cost at least $4000, so we figure we can haul a lot of water for that price and forego the well for now. Next spring we’ll get a 300 gallon water storage tank and put it under the cabin in the taller crawl area. We’ll have to have it filled from time to time. At the same time we plan to get a small RV water heater for some real (hot water type) showers.
We have been staying in the cabin all summer...very comfortable. Your website has been a wealth of information and help. I’ve had many, many comments, questions, and such about our building experience. Many many thanks for all your help.
An updated note about footings from the owner
I’ve received several comments/questions on our cabin since John posted our recent pictures. Some of the questions have been about the foundation we used. It appears that the current mindset about foundations is one that requires always digging down below the frost line and using concrete. We did not do it that way. Our cabin is somewhere between 8000-8500' elevation in Western Wyoming (cold!). Graphs and local resources indicate the frost line is 24-42 inches deep.
We built 15 framed 2' by 2' gravel pads with 6-10 inches of gravel as our base. We just dug down to where the soil was solid and didn’t have any more organic material (6-10 inches) and then filled these to ground level with the crushed rock. This was the main footing. We topped each with a two-inch thick 18"x18" patio paver on which concrete-filled cement blocks with post straps were placed. Six-by-six posts went up from these to support 6"x10" beams. We insulated each gravel pad with 6 inches of wood chips, then a 4' by 4' tarp, covered with a couple inches of soil, then two more inches of wood chips. Following an average Wyoming winter, we have not detected ANY movement in the cabin. All of the 9 windows and door open and close just like the day we installed them. This, in spite of having several feet of wind-blown snow under the cabin, which then melted directly on and around the foundation gravel pads. I plan on blocking the snow from building up under the cabin this winter. We have been very impressed with this kind of foundation. We dug it ourselves (with blood, sweat and tears...lots of tree roots and rocks) with shovels, wheelbarrow, and level. As long as you create enough bearing surface area to support the weight of the cabin, this kind of foundation will work. We have neighbors in our area who keep asking, “Has your cabin moved yet?” People are surprised when we describe the foundation we used. And I usually mention that the Scandinavians (lots colder than Wyoming!) have used insulated footings for decades. However, the neighbors remain skeptical. So far, it has worked for us, and we anticipate it will continue to serve us well. Just some thoughts for those who may be questioning this “low tech” foundation plan.
John’s Response
I think many types of houses would be fine with the footings you are using. You are probably enjoying a solid stable platform for two reasons: One, because you have insulated the footings as you describe, and two, because you have good drainage in the footings and your underlying soil is probably not high in clay.
For pier type shallow footings to move (or heave) the ground below the footing (the gravel in your case) has to both freeze AND expand. The local building frost depth almost anywhere is about twice the depth of measured true freezing (for a safety factor) and almost any type of insulation will cut this depth down further. Then, there are many soils that will freeze but not expand. Only clay and clay loam mixes will expand when frozen. Well drained gravel and sand will not move not matter how cold they get.
Standard concrete foundations are overbuilt by several 100% in most small house situations. This is one place where the owner builder has an advantage. Click here for a free report on simple post and pier foundations. Click here for the “Little House Plans” Hal used for this house (these plans include more detailed information on building shallow and insulated footings).
What follows below is the earlier story and construction pictures of this Little House
From an A-frame to a Little Cottage House
In December of 2000, we purchased 2 acres of mountain property about 20 miles north of Kemmerer, Wyoming in an area known as Commissary Ridge. It is about two-thirds aspen and lodgepole pine, and one-third sage. It is an area where many others have bought and built cabins, some very small and others that rival conventional-sized homes. Moose, elk, deer, an infrequent bear, and a variety of other small mammals call this area home. We are very glad to have them share this area with us. It is accessible by vehicle from April to November...depending on how early the snow hits. Winter access is by snowmobile. This is the story of our cabin-building experience. But keep in mind, I’ve never built any thing before.
The building site we chose was a natural clearing. We only had to fell a few aspen trees to create the space for our cabin. We started out building an A-frame cabin in May 2001. We did so having done a lot of research into how to build one, weighing the pros and cons...and following our hearts’ desire. The shape of an A-frame, we think, is attractive, and it seems to fit so easily into the landscape and the trees. Most of the A-frame plans we found, which was quite a task in itself, called for rough-cut lumber for the framing. Having never built anything from scratch, I assumed that calls for rough-cut lumber were made by those who knew better than I. So, we purchased about $1500 of 2x8 and 2x10 planks ranging from 12 feet to 20 feet in length. Now rough-cut material is the ACTUAL size it says it is...plus or minus half an inch. My calculations are that rough-cut material contains about 40% more wood than traditional dimensional lumber. That also translates into being 40% heavier. But I’m getting ahead of myself.
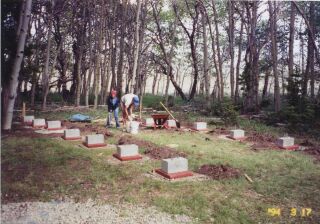
We chose a pier-post system based on plans by John Raabe, www.countryplans.com. We modified his plans which call for 4x4 piers, spaced 4 feet apart. We opted for 6x6 piers spaced 6 feet apart. We dug 14 gravel pads, six feet apart, each at least 8 inches deep and framed with pressure-treated 2x4s, two feet on a side, or 4 square feet. We used 18in x18in patio pavers for the foundation support, with 8in x 16in concrete blocks containing pier straps. I poured concrete into the cells of the 8x16 blocks and set metal straps into the concrete spaced 6 inches apart to hold the piers.
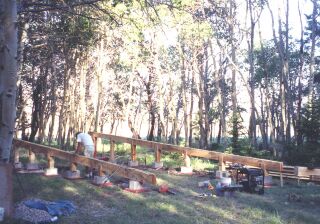
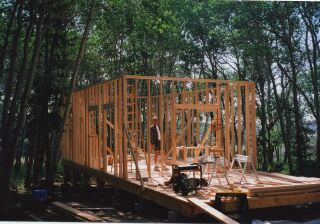
The beams were constructed from three 2x10s nailed together with 20 common nails and lag bolts at the joints which were centered over the 6x6 posts. The beams were 40 feet long, 28 feet for the cabin, and 12 feet for a deck. We had to rent an engine hoist to lift the beams up to level, and place the 6x6 posts underneath. Check out the installed beams in the picture below.
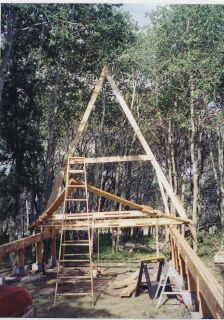
At this point, we began constructing the ‘A’ frames on the beams using 2x8 rough-cut material. The base of the ‘A’ was to be 20 feet, cantilevered over the beams by 30 inches on each side. The length of each side of the ‘A’ was 24 feet. The actual vertical height ended up being about 21 feet. Collar beams were attached about mid-way up which would serve as the floor of the loft. The end ‘As’ needed to be doubled. I calculated the weight of the end ‘A’, and it weighed about 660 pounds. References I had found said two men could push the ‘A’ up. Yeah, right. Well, we rigged up a pulley system and used my International Scout to pull the first ‘A’ up. We used a stout (we thought) aspen tree to anchor the rope to.
The angle of the rope from the tree to the collar beam on the ‘A’ was not ideal. It was more horizontal than vertical. A tremendous amount of tension needed to be applied by the vehicle to get the ‘A’ lifted. What happened was that we pulled the aspen tree out of the ground. So, I then linked about 4 aspen trees together with rope and a come-a-long and tried again. This time it worked and the end ‘A’ was up. Check out pic3 below. The second ‘A’ is propped up on the ladder ready to be hoisted up next. I have to say, it was impressive to us and we were excited about how it would look in the end. We fastened the ‘A’ to the beams and braced it up with 2x4s.
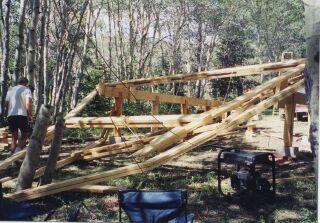
We figured that the end ‘A’, being so heavy, would be the hardest...and it was. We rigged up the second ‘A’ to hoist up. It “only” weighed about 350 pounds. But its relative “lightness” became our undoing. Once it was hoisted up to about 45 degrees, the tension on the rope decreased so much that, much like snapping a rubber band, the rope contracted rapidly and catapulted the second ‘A’ up so fast that I couldn’t stop the vehicle fast enough to prevent the second ‘A’ from hitting the first ‘A’. It hit the first ‘A’, bounced back, then hit it again, and it all came tumbling down. My wife and I watched in horror as a month of June 2001 weekends splintered, cracked, and shattered. The pic4 below shows the aftermath.
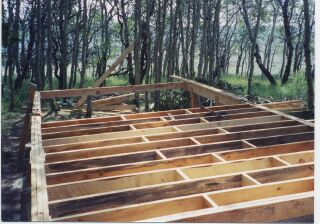
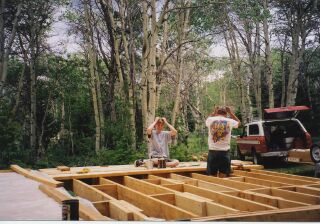
Honestly, we were quite discouraged at these events, and for all the time and money we had already invested in the A-frame project. After tears and curses, we had a reasonable discourse and decided to opt for plan B. Plan B, all along, had been to build the 14x24 Little House described at www.countryplans.com. However, the beams were designed for the A-frame and were 15 and a half feet wide, outside to outside. The Little House was to be 14 feet wide cantilevered over two beams 9'8" apart o.c. So, I consulted joist span tables and found quite a discrepancy in figures for joist spans. I also recalled that rough-cut 2x8s have about 40% more wood than a typical, planed 2x8. So, I decided to use the rough-cut 2x8s as floor joists. I doubled-up the end joists (making a 4x8), and also doubled-up the floor joist directly under the edge of the would-be loft support post inside. I dug an extra footing directly underneath the doubled joist and installed a 4x4 post. Also, I installed blocking between every joist. With these modifications and building doubled joists, I hoped that the floor wouldn’t sag. I knew that I was pushing the joist span envelope. Using rough-cut lumber for joists involved taking joist-hangers for typical 2x material and re-working them to fit actual 2x lumber. What a pain! I later found out that rough-cut joist hangers are available. We were wondering if we would ever get free of the mistake of buying rough-cut lumber. The pic5 below shows the floor joist project.
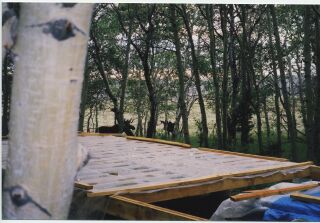
After getting the floor joist project done (it took my wife and I 3 days), we insulated the floor with 6'' kraft-faced fiberglass insulation. To keep the critters out of the insulation, my son and I spent a day on our backs underneath, nailing and screwing 4x8 sheets of eighth-inch pegboard on to the bottom of the joists. We sealed it up well with caulking and it seems to be working. The pic6 below shows us installing the insulation. Itchy! Itchy!
We covered the insulation with plastic to keep the rain off. The next morning, two Bullwinkles showed up to check out the latest construction project in their neighborhood. They are in the picture7 below.
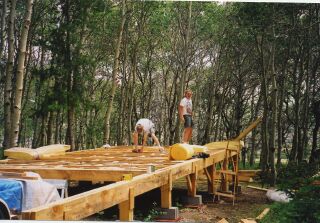
Next, we nailed down 4x8 sheets of tongue-and-groove OSB flooring. It was good to have gotten something to walk around on soon after the A-frame fiasco. Check out the pic8 below.
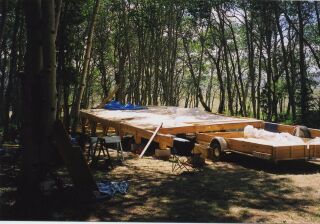
To provide an area to work on before constructing the walls, my son and I built a deck using more of the rough-cut lumber as joists and floor boards. This involved more cursing and swearing as well as hair-pulling, as seen in the next pic9.
The finished deck is rustic (and rightly so) due to some 2x material being 2.25 inches, others 1.75 inches, thick. What an experience with rough-cut lumber. Kim and Nathan celebrate deck completion in the pic10 below.

What a joy it was to work with typical dimensional lumber! A 2x4 was always 1.5 inches thick by 3.5 inches wide. We’d never known such luxury! I drew my own wall plans, using the plans for the Little House from www.countryplans.com as a guide. I chose to use 10-foot wall studs to create some spaciousness inside. The first wall is shown below in pic11 and will house a large picture window of fixed glass.
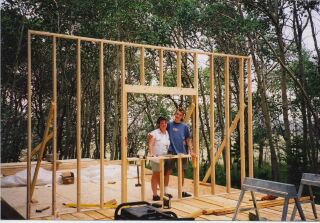
My son helped us get three out of four walls constructed and raised before he had to head back to Montana. My wife and I constructed the final 28' wall in two 14-foot sections as shown below in pic12. And it is very, very close to being square. In the month of July 2001, we got all of this done after the A-frame crash.
I sheathed all the walls in two days with a couple hours help from a neighbor. Windows and door got cut out. Here’s the pic13 of the sheathing.
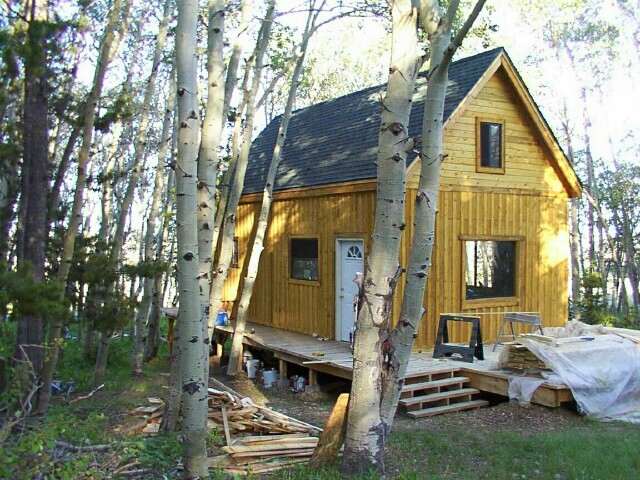
We built the lofts and installed a support post under the middle of the doubled end joist. We used 2x6 material for the joists. I also constructed a beam to support the midpoint of the loft. We began plans to build the rafters and roof and got as far as getting ready to install a ridge board. Both of us immediately realized that roof framing was beyond our ability to do it safely. We hired a local builder out of Kemmerer, Wyoming. I figured a local builder from a small, nearby town would have some semblance of trust, “your word is good enough.” Well, he did get the roof framing done, as well as the roofing on, but it turned out somewhat shoddy. But I can’t complain too much because I’d never have gotten it to that point this past summer. I learned that builders deserve their pay. You pay for their knowledge AND their ability. Below are some inside and outside pics after the roof got built. (Pics 14-18).

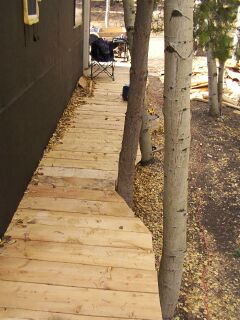
We’ve got it all dried in for the winter. We have constructed a walkway down the length of the cabin and have built a small deck on the back of the cabin as seen in the picture above...all out of the rough-cut lumber. It appears I’ll end up losing about $300 in rough-cut lumber when it’s all over with. I guess the remaining wood will be used up as some very expensive firewood.
We don’t have any regrets about abandoning the A-frame project. I still love their look. But A-frames are not built very often any more, and current information about A-frame construction is sparse. I shudder sometimes to think of what the floor of the A-frame cabin might have been like considering the inconsistent dimensions we were working with using rough-cut lumber. Had we use conventional sized lumber perhaps the outcome would have been different. But we are very happy with what we have constructed. I’d like to say that John Raabe of www.countryplans.com has been very, very helpful in providing comments to numerous questions we have had about building. His plans for the Little House cabins are very good and he has always been prompt about providing information. We used his plans to learn a lot about building and adapted much of what we built according to the information in his plans and the discussion board on his website.
If I were to do it over again, I probably would look for a cabin already constructed but perhaps in need of refurbishing. I am much more adept at refurbishing than I am at new construction. New construction involves much, much more than I ever envisioned it would. Romantic as it is, building our own place has put much stress on us... and we still have a long ways to go. If anyone reading this is considering building, and you aren’t a builder by trade, it would serve you well to research your project thoroughly, plan on it taking longer, costing more, hurting more, than you think it will.
I’m not complaining here, just taking a realistic look at what we took upon ourselves. We’ll get it done next summer but only with a lot of time, persistence, and patience. But the time will come next summer when we can sit back and laugh, and relax and enjoy the fruit of (mostly) our labors.
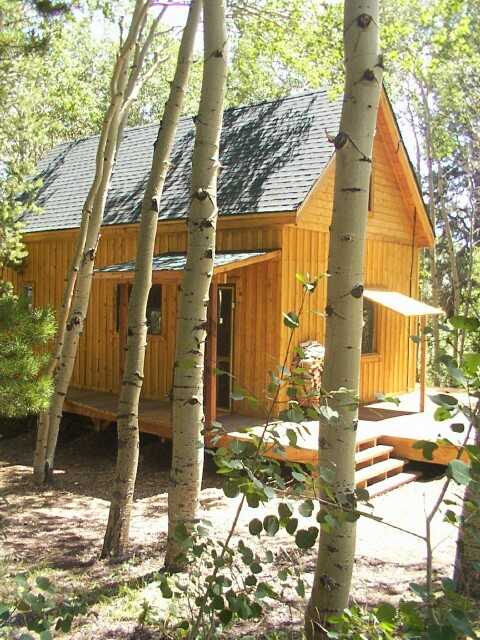
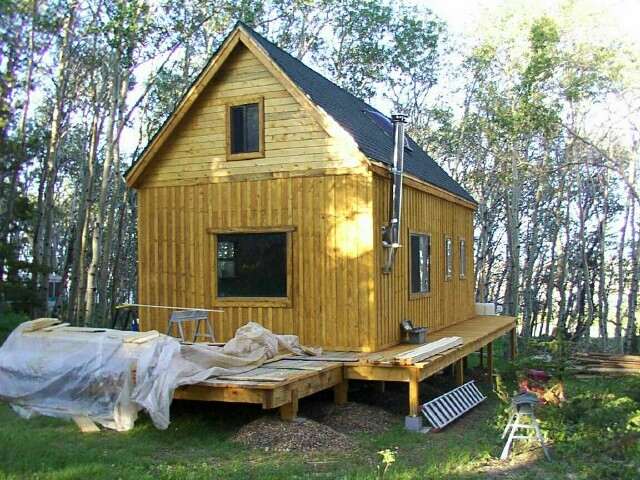
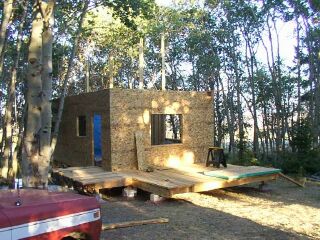
Updated photos June, 2002:
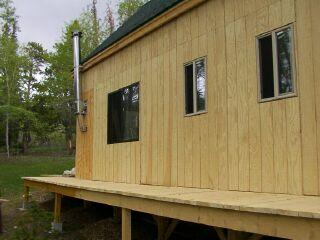
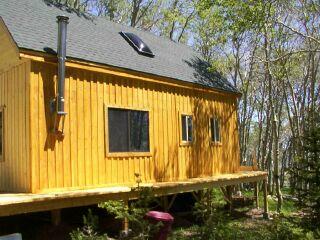
I’ve attached four more pics of our cabin as of June 2002. We put up 5/8" T1-11 plywood for the siding on the 10' walls. We also completed the walkway/deck all the way around the cabin. We will finish off the gable ends with shiplap siding above the T1-11.
Where to go from here
- Read the free report on simple post and pier foundations.
- Browse the Owner Builder Gallery for stories of other projects.
- Ask general questions about building cabins and small houses in our forum.