A Boat Builders Little House
Updated 8/21/2012
 |
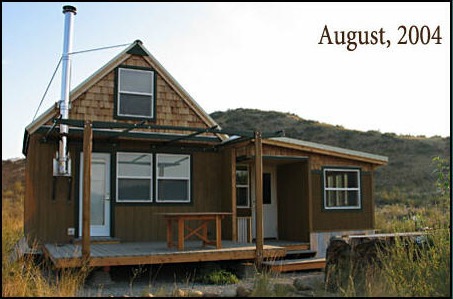 |
Note: Several years ago, the owners bought our Little House plans and sent us the photos and narrative below about building their cabin. We have just recently visited their website and are posting the addition photo above.
I found the Little House plans back in February shortly after we closed on some rural land in north central Washington. Our original 1000 sq ft "dream house" went out the window when we purchased these 15 undeveloped acres instead of a stamp sized residential lot. This decision more than tripled the land cost and left us with less than ten grand left for the house, all things included. In the end, this turned out to be a blessing.
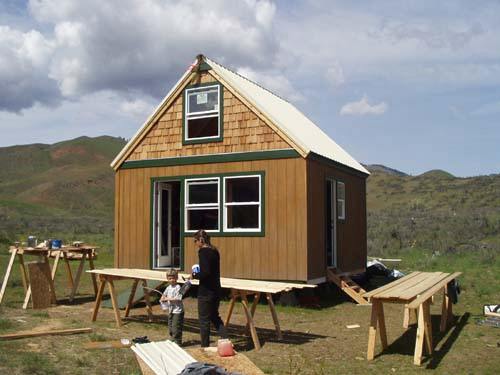
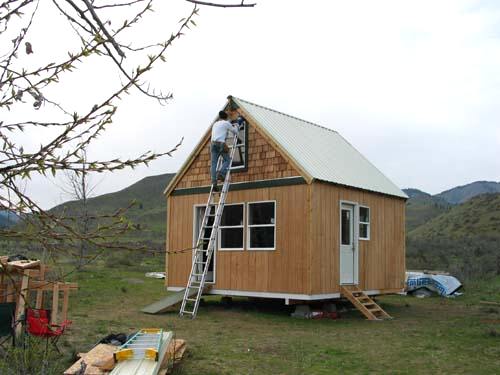
We have just finished building the cabin and I will soon have to go away to my summer job in California. This cabin will be the full time home for my wife, 4 year old son and myself starting in the fall.
We had no prior construction experience except building a 8x12 strawbale shed on another property several years ago. I am a wooden boatbuilder by trade, so I know tools and how to make tight fitting joints, but the construction trade was a new realm for me.
The plans are great, very affordable and easy to use. The step by step addendum is indispensable.
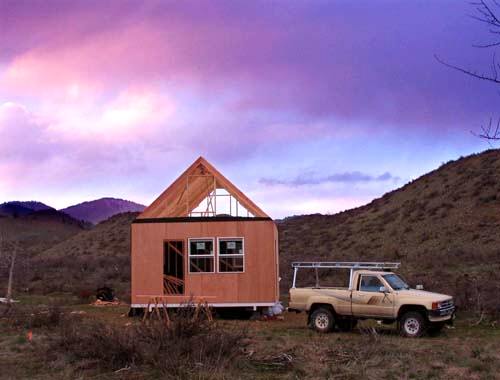
We didn't hire any skilled labor, had no excavators or anything heavier than my Toyota truck on the site and even had to walk in until our driveway was done. We worked without electricity for the first half until a generator was acquired. This was no problem as long as one has a real sharp handsaw and a cordless drill. Of course it took longer, but the quiet, old fashioned way of working was something to remember.
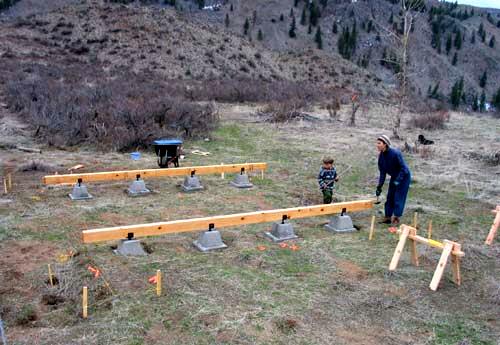
The foundation is hand dug holes 20" square, 16" deep and filed with gravel. On top are pavers and piers. It's just like John suggests in the plans and is so easy to do. My contractor friends call this a 'hillbilly' foundation. We got the piers with adjustable brackets for super simple levelling of the main beams.
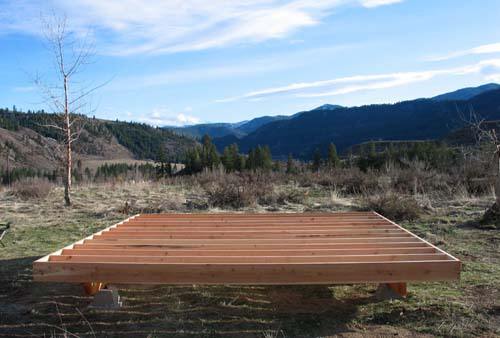
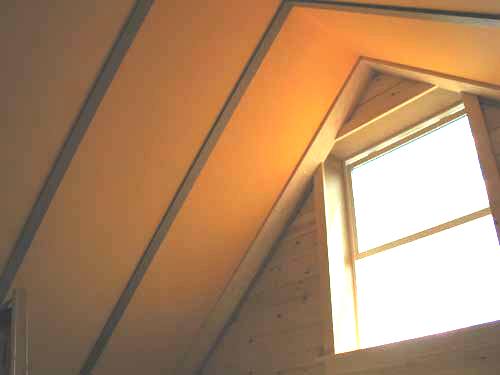
The floor is framed with 2x10's and has R30 insulation We changed the floor plan to a square 16x16 layout. The 16' width gives even me, at 6' 3", standing headroom in the loft. This meant adjusting some lumber scantlings here and there and upgrading the foundation with a few more piers. It's a full loft with a trap door so we have a total of about 400 sq ft of usable interior space. With the windows in both gables and a yellow painted ceiling, the loft is a bright and well ventilated space — a perfect bedroom.
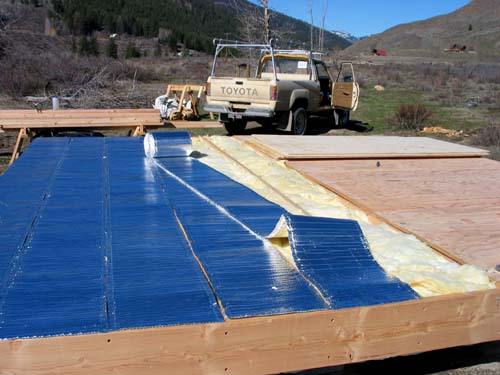
We have a very cold winter climate so we framed the walls with double walls of 2x4 @ 2' OC which gives you R13 + R13 with no thermal breaks as the studs are staggered and there's full insulation behind all electrical boxes etc. The roof is framed with load bearing 2x8's (R21 w/ room for a vent space), and staggered 2x4 sleepers on the bottom side (for and extra R13). There's Reflectix foil-faced bubble wrap under the roof sheathing as a first barrier against the hot summer sun. It is also used as the vapor barrier in the floor system (seen above).
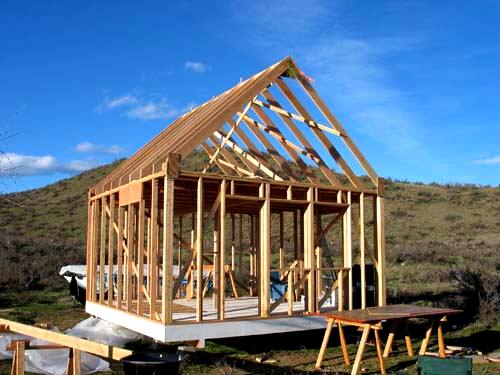
All windows are low-E and the design is as passive solar as possible without being having the ability to use tons (literally) of thermal mass. We wanted the gable ends on a north/south axis so we could have as many windows as possible on the sunny south side of the cabin without compromising a load bearing wall. This design also accommodates an easy add-on of a future 300 sq ft addition going off both the east and west sides as shed roof additions. To further maximize the loft headroom we lowered the downstairs ceiling to 7' 6", which also makes it easier to heat in the winter.
Instead of resting the loft joists on the top of the top plate, I bolted them into the studs directly under the plate (so they work as collar ties) and carried the load to the floor with 2x2's sistered to the studs. We attached the rafters to the plates with metal framing anchors.
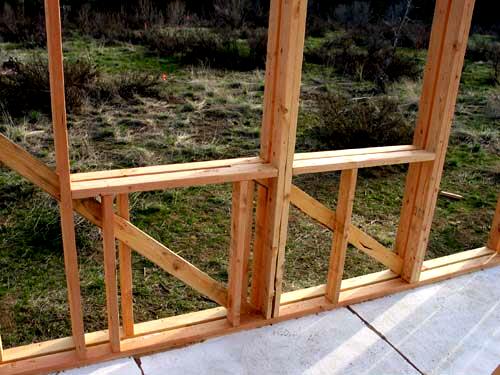
Here you can see the double 2x4 wall framing.

We used cotton batts made from denim scraps instead of nasty fiberglass insulation. This makes the task of insulating quite tolerable instead of being a dreaded, dangerous chore. I definitely did a better job than I would have with fiberglass. It is more expensive but when you're building small it's all very affordable.

Here you can see the foil-faced bubble insulation above the cotton batts. The second layer of batts will go in the inside 2x4 cavity.
Not wanting to have anything to do with drywalling and finding a full tongue and groove pine interior a little overwhelming in both appearance and cost we had to come up with an alternative. And we found it in strawboards, a sheet material made of compressed straw (a waste product) put together with a non toxic, formaldehyde free binder. We bought 20 some sheets @ $13.00 ea and had the interior panelling up in no time. The seams have battens on them made from ripped lenghts of strawboard and there's sections of T&G wood in select areas like the loft gables, and the bottom 3 ft of downstairs walls — areas that will get the most wear and tear.
The downstairs ceiling is also the floor of the loft. It is a single layer of 1x6 T&G pine boards supported by the exposed floor joists @ 2' on center. A more conservative material would be 2x6 T&G, but we found this 3/4" thick floor to be amazingly sturdy and fully adequate as a loft floor.
The siding is a T1-11 derivative called Breckenridge, which locally is actually less expensive and far more attractive. It looks like it's faced with Okoume, a tropical wood also used on marine plywood and hopefully sustainably harvested. It's shear and siding all in a single layer, so that stage goes fast. We stained it with a semi transparent water based exterior stain. I used a similar product combination on a garage at 8600' in the Sierras, where there's plenty of snow and rain, pared with intense sun, and it stood the test.
We chose metal roofing simply because 99% of all houses here use it. Installing it was the most challenging aspect of the whole construction process, mainly due to the steep roof pitch. My brother-in-law provided a much needed extra set of hands during this process. Thanks, Ralf. An advantage to metal is that it is available in light colors to avoid overheating in the summer. We went for ivory, which looks awesome and hardly gets warm even on 90 degree days.
The heating system will be a wood stove with the chimney exiting through the sidewall. This is not installed yet.
The total cost of the cabin as it stands now with the interior 80% finished is about $6,000.00, which is all new materials — and not big city 'Home Depot' prices either.
We have put about 70 person days into the project so far, which is a lot it seems, but the approach was to do a quality job with the best materials we could afford. Plus learning as you go takes a bit of extra time.
I know we've learned a lot. I would love to share all this with anybody interested, hence this post. There's lots of ideas in the works for avoiding complicated plumbing and expensive regulatory installations. Some of these are grey water, sawdust toilet, hand pumped water, Zodi system showers, etc. We will install a simple photovoltaic solar electric system in the fall and still wonder how to get water from the newly drilled well to the house without digging a trench thru the native bunch grasses and bitter brush. - Jan, Sonja, and Bj�rn Nicolaisen.
• Click for the Little House Plans this cabin used. • Click to return to the CountryPlans Home page and see other small home plans. • Click the Owner Builder Gallery to see stories of other projects. • Click The Forum to ask questions about building cabins & small houses. |